 or press the Scan key to review
the records currently on file and select one for editing or viewing.
or press the Scan key to review
the records currently on file and select one for editing or viewing.In Initial Setup, use this function to enter processed invoice information as needed for historical purposes. Since processed invoice records are created during the Process Initial Setup function for all invoices entered through Opening Transactions, use this function only to add processed invoice records that are fully paid and not included in the opening transactions. In Live Operations, this file is system-maintained and cannot be modified.
This file holds processed invoice records by vendor for the number of months indicated by the Months of Processed Invoices specification on the Parameters (Posting) Screen. In Live Operations, obsolete records are deleted during Close Month processing based on the later of invoice date or date paid.
The Processed Invoices Screen, shown in Figure 4-9 below, appears when
you select Processed Invoices
from the File Maintenance
Pulldown Menu. You normally enter this function in Inquire mode but
you can change mode by using the mode icons on the toolbar or the mode
function keys. Since Change mode places a hold on the selected record,
use Change mode only when you intend to change data. If desired, in key
entry, you can click on or press the Scan key to review
the records currently on file and select one for editing or viewing.
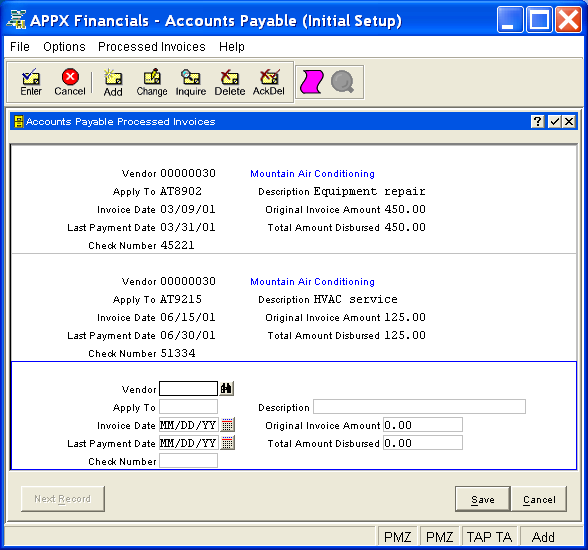
Figure 4-9. Processed Invoices Screen
This is a scrolling screen which contains the following fields for each record:
Enter the number of the vendor which must be on file in the Vendors
file. You can click on or press the Scan key to find an
appropriate entry. The system displays the vendor name so that you can
verify your entry. If you are entering a miscellaneous vendor, be sure
to enter the name and address information through Miscellaneous
Vendors File Maintenance.
Enter the number of the invoice, credit memo, or debit memo affected by this transaction, up to 8 characters in length. The apply to is generally the invoice number (except for invoices that affect an earlier invoice, in which case the apply to is the original invoice number).
Enter a description if desired, up to 30 characters in length.
Enter the date of the invoice.
Enter the original invoice amount (with up to 7 digits to the left of the decimal and 2 digits to the right, plus a "-" if needed for a credit amount).
Enter the date of the last payment made toward this invoice.
Enter the total amount that has been paid for this invoice (with up to 7 digits to the left of the decimal and 2 digits to the right, plus a "-" if needed for a credit amount). The amount paid is equal to the invoice amount if the invoice has been paid in full with no discount or if you are using the "lost" discount method and the invoice has been paid net of the discount. The amount paid is less than the invoice amount if a partial payment has been made to the invoice or if you are using the "earned" discount method and the discount was taken for this invoice. For more information, see the Discount Method specification on the Parameters (Posting) Screen.
Enter the number of the check for the last payment made toward this invoice.
Press ENTER or click  or the Save
button to save the information for the current record. If any information
has changed, the system may redisplay the screen to show any new or changed
system-supplied items or to report any error or warning messages. If so,
the current record has not yet been saved; you must address any concerns
and press ENTER or click or the Save
button again. To exit without saving, press END or click
or the Save
button to save the information for the current record. If any information
has changed, the system may redisplay the screen to show any new or changed
system-supplied items or to report any error or warning messages. If so,
the current record has not yet been saved; you must address any concerns
and press ENTER or click or the Save
button again. To exit without saving, press END or click  or the Cancel
button.
or the Cancel
button.
The following icons are also available for use on the toolbar (unless disabled in Add mode or until a record has been selected):
 List Processed Invoices:
See Processed Invoices List
for further information.
List Processed Invoices:
See Processed Invoices List
for further information.
 Display Processed Invoice
Audit Info: See Audit
Info for further information.
Display Processed Invoice
Audit Info: See Audit
Info for further information.
Click the appropriate icon to perform the desired operation (which first saves the current record if applicable), after which you will return to where you are.